Lately as my collection of storage has grown I’ve found myself more and more in need of having some system in place, instead of a number of different hard drives which each may or may not contain something I’m looking for. I don’t have the resources to buy a number of identical drives to implement RAID, or to set up a second computer with an operating system that supports ZFS just for storage. If I really want to implement a system, it’s going to be in Windows Storage Spaces, using the parity space.
September 2016 Update: After a couple years, a single bad drive cost me a parity space, and even Microsoft’s advanced tech support isn’t helpful on the issue. Seeing as the parity space should have been resilient to the single failure, I’ve moved on from the system, and wouldn’t recommend you use it. My post does remain below for reference however.
Lately as my collection of storage has grown I’ve found myself more and more in need of having some system in place, instead of a number of different hard drives which each may or may not contain something I’m looking for. I don’t have the resources to buy a number of identical drives to implement RAID, or to set up a second computer with an operating system that supports ZFS just for storage. If I really want to implement a system, it’s going to be in Windows Storage Spaces, using the parity space.
Being cautious, I started googling for how storage spaces would work in the long term, and how these workings would fit my time and financial resources.
Questions like, How will the array handle it if I expand? Can I add another drive, or am I restricted to swapping old ones out? How fast will the pool be? What happens when a drive fails? Do I have to replace a failed drive? and finally, Why don’t people like this?
But the internet wasn’t of much help. Searching around will yield lots of confusion, complaints, and a few people who implemented very specific test cases in virtual machines to see how things worked. By making a couple assumptions, and a list of things I’d need to do if I lose my data, I set out to see how storage spaces work for me, and document it online.
After a few days of testing, my experiences can be summarized in a few quick lessons, with details and explanations following.
Lesson 1: Parity spaces are not as efficient as RAID5 Lesson 2: Parity spaces are slow Lesson 3: Repairing arrays is quirky Lesson 4: Removing drives is okay Lesson 5: Rebuilds are slow Lesson 6: You can replace a drive with itself
December 2015 Update: In a recent update to windows 10, Microsoft has added the ability to optimize the distribution of data across drives. This negates the need to remove and reinsert a drive to force something resembling a rebalance.
Also added is the ability to prepare a drive for removal: rather than pulling a drive and then repairing the space, windows will now copy over all the data from that drive before you pull it. Because the option only shows up for drives that can be safely removed, it’s also a decent indicator of whether you’re over- or under-provisioned. this is much simpler than using an excel spreadsheet to figure out how to properly expand your storage.
These features are only available in windows 10, and older computers will no longer be able to recognize the space.
Step 1: Taking inventory
At the start of this project, I have 6 hard drives, of varying sizes, brands, and types. Not ideal, but I’m not picky. Listing out what I have leads to:
- One 3TB WD Red
- One 2.5TB WD Green
- One 2TB WD Green
- One 500GB WD Black
- One 3TB Seagate
- One 750GB Seagate
From my searching I know that starting with 3 drives then adding more gets messy, since the drive will be unbalanced and storage spaces can not be rebalanced. So I move as much data as possible to external drives, and end up needing one of the 3TB drives from above as well to hold the data while I migrate the rest.
Step 2: Getting Started
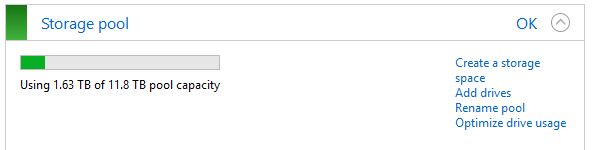
I pool the remaining drives together, and get about 8.5TB of space to work with. I create a parity space using all the pool, which means I can store about 6TB of data.
Lesson 1: Parity Spaces vs RAID5
When describing the parity storage space, it’s most often compared to RAID5, in that if you lose a disk, you don’t lose any data. While this is true, there are some major differences in how this is managed. In a RAID5 array, all the drives must be the same size, and your pool can have N drives as long as N is 3 or more. The data is evenly distributed across all N disks, in such a way that if one disk fails, the data can be rebuilt. This means that you get the storage capacity of (N-1) disks. For a 3-disk array this means 66% of available capacity, but for a 10 disk array you get 90%. The more disks you add, the less space is wasted.
Parity spaces do not work like that in the slightest. No matter how many drives you have, any one piece of data exists on only 3 drives. This means you get 66% of your total storage space no matter if you have 3 drives or 300. I have to imagine it wouldn’t have been hard to create an algorithm that puts data on as many disks as possible to save space, but this might have hurt another feature we encounter down the road.
Back to my own parity space. I have 3TB of data, ready to slot into a 6TB space. I’m hesitant, so I make a few small transfers (10-500GB) and monitor the progress.
Lesson 2: Parity Spaces Are Slow
Throughout all the transfers, moving terabytes of data, the drives managed about 10MB/s. These drives are capable of, at a minimum 50MB/s, and really much more since the data is being striped. But the parity calculations are hard, are CPU intensive, and are actually the bottleneck here. If speed is important, use a two-way mirror where the only bottleneck are your drives and the controller. you’ll lose space, but get the full performance out of your drives.
The same volume, in bytes of data is being written to each disk. I would have expected it to write proportionate amounts to each disk based on that disks size. So where I expected to see, say 5% of each disk used and varying amounts, I see 100GB of each disk used, with percentage used ranging from 3% to 13%.
However, I’m not seeing any more space being used than expected, having written 300GB to the space I have about 450GB of raw space used, so it’s roughly what I expected. I keep on copying data over.
As I put about 2TB of data on the pool, it seems the data is being spread out more proportionally. My large (>1 TB) drives still have roughly the same amount of data, at 800GB each, but the 750GB drive has 500GB of data, and the 500GB drive has 355GB of data. Interesting fact, there.
At roughly this time, I notice that my system drive is acting weird, I start to worry that it’s dying. I decide I’m not buying another drive, so I decide I’m going to pull the 500GB drive from the pool, use it to clone my system drive, and allow the 3TB seagate to take its place in the pool.
Step 3: Replacing A Drive
This should be easy, right? I pull the 500GB drive, and open up my storage spaces panel. The array is in a degraded state, but all my data is there and accessible. I have two options at this point, remove the 500GB from the pool, or add the 3TB drive. I click the button that removes the 500GB from the pool, and windows immediately allocates space on the other drives to take the load. I frantically added the 3TB to the pool, but it was too late. It was to be left with no data on it.
Lesson 3: Repairing arrays is quirky
As soon as you tell windows to remove a drive, it will decide where it’s going to put the data from the repair process and begin repairing. Any changes made to the pool after that click has no effect.
Lesson 4: Removing drives
If you have 4 or more drives in a pool in parity configuration, and choose to remove one, you can repair the array to the remaining drives without having to add another drive. This is useful when you don’t want to buy another drive just yet. (This is what I was referring to with lesson 1, distributing data evenly across all the drives would have made this process more difficult to implement.)
So that one’s on me. I don’t like the design, but I didn’t know how the space worked, and I got bit. I’ll take that one, and I’ve got an idea at this point anyways. I let the space rebuild, it takes about 12 hours to rebuild the 350GB of data that was lost. Remember Lesson 2?
December 2015 Update: Now added is the ability to prepare a drive for removal: rather than pulling a drive and then repairing the space, windows will now copy over all the data from that drive before you pull it.
Lesson 5: Rebuilds Are Slow
This is true even in a hardware RAID5 configuration, but you really feel it when your processor is trying to crunch the parity data to rebuild. Expect this to be a long process.
So the rebuild is done, and all my data is inside the storage space. Success? Not yet. Time to poke in at the distribution of data. After the rebuild the distribution of raw data is as follows:
- 3TB WD Red: 950GB
- 2.5TB WD Green: 950GB
- 2TB WD Green: 950GB
- 3TB Seagate: 0GB
- 750GB Seagate: 530GB
I’m not a fan of this. While I could totally let it go, and trust windows to balance things out over time, I’ve got an idea. And I want to test my idea. So I pull up EASEUS partition manager (windows will absolutely not let me see the disks as individuals without removing them from the pool) and empty the 750GB seagate.
My storage spaces panel turns yellow, the array is in a degraded state. Perfect. I can now remove the 750GB drive from the pool, and redistribute its data to the other drives, or I can add a drive. I click on add drives, and the 750GB Seagate is listed there. I click add drive, wait a minute, and get a file access error. So I reboot my PC, and head into the storage spaces panel, and successfully add the drive to the array.
At this point there are now two listings of my 750GB Seagate in the pool, one in it’s empty, ready to receive data state, and one listed as “disconnected”, with windows letting me know how much data it was holding. I remove the “disconnected” drive from the parity, and windows initiates the rebuild, allocating space on my drives like so:
- 3TB WD Red: 1TB
- 2.5TB WD Green: 1TB
- 2TB WD Green: 1TB
- 3TB Seagate: 120GB
- 750GB Seagate: 120GB
Okay, so this isn’t much better. But it has taught me something.
Lesson 6: You Can Replace A Drive With Itself
Yeah, this is crazy. But, by pulling a drive and replacing it with itself, the data on the drive was distributed to the entire pool (including itself) just as new data normally would be. This means you can force a bit of a rebalance by pulling a drive and replacing it with itself.
I’d really like to see the results of me running this process with my 3 large drives, however I don’t want to spend a week rebuilding the space just for some experimental data. I expect I’d end up with the most data on the drive you first refreshed, with less and least from the 2nd and 3rd drives, with lots of data on the 3TB Seagate which is currently almost empty. The 750GB drive would probably have roughly the same 500GB as previous, maybe a little more, however storage spaces seemed to stray from loading the drive up too far.
December 2015 Update: In a recent update to windows 10, Microsoft has added the ability to optimize the distribution of data across drives. This negates the need to remove and reinsert a drive to force something resembling a rebalance.